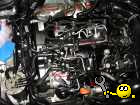
Here is a description of how to clean the particulate filter on a 2.0 TDI engine with the code BPW.
Here are some details about the vehicle:
A4 8E B7, manufactured in 2007, mileage 180,000km, first-generation particulate filter, experiencing occasional issues with jerking at high loads and engine speeds around 1500 rpm.
The ash mass that was recorded in the STG was 56g (max. 60g).
Before flushing the DPF, the differential pressure of the filter was determined using a VAG tester.
At 2000 RPM, it was 40hPa.
After rinsing, it was only 5hPa.
Since the 8E model was launched in 2001 as the B6, it was never intended to be equipped with a particulate filter.
Unfortunately, the DPF is installed in a very complex manner. However, no special tools are required to remove it.
Before expanding, you should obtain the following parts:
- 6 copper nuts M 8, N 902 002 01
- Metal gasket between turbocharger and filter 3A0 253 115
- Solid gasket between filter and flexible hose 1H0 253 115
- Copper paste for mounting the nuts.
To convert all non-water-soluble residues within the DPF into ash, a forced regeneration should be performed before removing the DPF.
Only the pure ash can be flushed out with water from the filter.
Procedure for removing the DPF:
The following parts must be disassembled first:
- Engine cover
- Airflow management.
- Air filter
- Differential pressure sensor
- AGR valve
- AGR cooler
The AGR cooler is connected to the water circuit.
To prevent coolant loss, it is important to have the appropriate tools to seal the lines.
It is advisable to clean the AGR valve and the AGR cooler periodically.
The EGR valve was previously very clogged. However, it was still functioning.
After disassembling the parts mentioned above, you will have a clear view of the DPF flange.
It is attached to the turbocharger's stud bolts with three nuts (SW12, M

.
After loosening the three nuts on the turbocharger, the nuts on the flange connecting to the flexible pipe must be loosened. This is the most difficult part, as it is very difficult to access the nuts.
If you have the option, you should remove the right driveshaft. This will make the job much easier.
The exhaust pipe is attached to the transmission housing with a spring-mounted bracket.
The bracket is attached to the transmission housing with 2 screws (16mm socket, M10 thread).
Once the bracket is removed, the flexible pipe can be detached from the DPF flange.
Now, the oxygen sensor needs to be removed.
The connector for that is located behind the coolant reservoir on the firewall.
Various cable ties need to be cut.
When removing the oxygen sensor, be careful not to kink the cable directly connected to the sensor.
In addition, the temperature sensor at the DPF inlet must be disconnected.
Now, you need to disconnect the hoses running from the DPF to the differential pressure sensor (G450).
These should also be cleaned.
Now, the DPF can be removed from the engine compartment, positioning it upwards.
Flushing the filter:
The inlets and outlets of the differential pressure lines, as well as the housing for the temperature sensor and the lambda sensor, should be closed off using appropriate screws.
I initially used a garden hose to flush out the DPF.
Unfortunately, it shows little success.
The use of a high-pressure washer with a rotating nozzle resulted in greater cleaning effectiveness.
Since the DPF (Diesel Particulate Filter) in BPW systems is a closed system, it is important to pay attention to the direction of the cleaning process, specifically to clean it against the flow of exhaust gases.
The filter should be rinsed thoroughly several times in all possible positions using a pressure washer. Compressed air can be used to remove any remaining water from the channels.
A thin wire is used to verify the cleaning effectiveness. If the wire can be inserted approximately 21 cm into one of the ceramic channels, the filter is free of ash.
It is recommended to dry the filter with compressed air before reinstalling it.
I let the filter dry for 4 hours above a heater before installing it.
The installation is done in reverse order.
Make sure to screw in the oxygen sensor in a way that the cable doesn't get twisted.
When tightening the flanges, all screws or nuts should be coated with copper paste.
In addition, it is important to ensure that the sensor cables are mounted exactly as before. All cables and hoses should not come into contact with any of the hot parts of the exhaust system.
After installation, the ash content value in the control system should be reset.
A value of 6g is recommended because this method cannot completely clean the filter.
It may be necessary to adjust the value. If it's not correct, the DPF may be regenerated too frequently.


 Bookmarks
 Links
Links Garage
 FAQ, Legal Notice & Privacy
 RSS Feed
 Register
 Login
Login