Document about errors in the start-up lock system of the Passat 35i, model year 1994.
Symptoms:
*************************************
- Engine stalls while driving.
- Usually (but not always) it happens after turning the ignition key off and on immediately.
- Partial blockage of the starting process, after tapping
The dashboard near the light switch can then be restarted.
- If the start process is blocked, the cockpit (control lights) are also dark!
Side effects on all elements of the engine control.
Error messages: Sporadically: Accelerator pedal position sensor, LMM, and others.
Cause:
*************************************
Faulty solder joint in the immobilizer.
Affects motor management and results in various error messages due to insufficient power supply.
Solution:
*************************************
- Expansion and repair of the starting lock.
(sitting behind the light switch on the left side of the dashboard.)
The light switch is held in place by a latch.
This needs to be pushed to the side with a small screwdriver.
Then the light switch can simply be pulled out.
UNDER NO CIRCUMSTANCES, DO NOT SIMPLY PULL OUT THE LIGHT SWITCH WITHOUT RELEASING THE LOCK -- OTHERWISE, IT WILL BREAK [icon_smile.gif]
Then carefully pull the ventilation grilles out with pliers - do not use excessive force, just gently pull.
Behind the ventilation grilles, there are a total of 4 screws that hold the tachometer housing in place.
Carefully lift the cover up and out over the steering wheel.
Caution with the daily odometer indicator.
[icon_smile.gif]
Then you can access the ventilation outlet on the left (above the light switch).
simply remove...
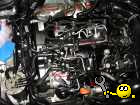
Behind the left-hand side of the "dashboard" panel, you'll find the object of our desire.
Expanding works only if you either have snake fingers or a screwdriver with a flexible shaft.
With a crosshead, the two screws are loosened.
Then you can remove the WFS.
Carefully remove and pull out the two plugs!
From now on, only professionals with a license are allowed to continue!
*************************************
In my WFS, I then used a {TOOL} to attach the tongues of the housing.
Carefully loosen the screwdriver to then open the case.
Even at the first glance at the PCB, there was a cold solder joint on a .
to identify the two relays for powering the control unit and the motor.
You must perform the welding yourself!
The installation is carried out in reverse order.
--- First, tighten everything up once the cockpit cover is reinstalled! -- I messed it up too...
...
and now, when the car starts up again -
So, do you really have the license to solder?
Have you saved around 300 euros?
Classroom hourly rate or?
Post by micha_passat.
Translated on 03-07-2026, 15:19.
|