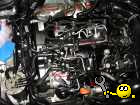
Is the marked area a defect, or is there possibly a crack visible there?
To avoid having to constantly search for the correct position when repeatedly screwing and unscrewing the VTG, I have marked it there (see picture 6). I'm just a bit paranoid about it and suffer from a marking obsession.
3B5 AJM
Wer nichts weiss, muss alles glauben.
**Technische Fragen bitte ins Forum und nicht in mein Postfach**
Great job, BM, thank you. Roger's discovery is probably correct; the crack likely extends further downwards. I experienced something similar with my 1749vb on my Leon. It's probably very hot there, and the material is thin, which causes this to happen. I was powerless to prevent it.
Regarding the VTG (Variable Turbine Geometry): I used sandpaper to work on the surface of the exhaust casing. First, I used a coarser grit to remove some material, then a finer grit to keep the surface relatively even.
"This modification had a positive effect on subsequent logging trips. The difference between the target and actual boost pressure was significantly less than before the modification, which was particularly noticeable when I only lightly touched the accelerator."
100_1207.JPG
Description:
Turbolader mit Riss
File size:
1023.53 KB
Viewed:
5448 times
2010 Caddy kombi life 103 tdisg6 BMM KXW
reflexsilber met.
"The assembly is actually doable. For next time, I'll probably have to improvise some suitable open-end wrenches. I didn't even remove the DPF; instead, I wrestled the turbo out of the exhaust manifold, then moved it forward to detach the DPF, and finally pulled it upwards towards the air filter. I couldn't find anything in my collection of tools to loosen the screw for the bracket. I ended up leaving it on, which proved helpful when reattaching it to the exhaust manifold, because the DPF, with its two spring-loaded fasteners, was quite stubborn."
Although the current measurements are relatively good (I need to review the logs again to fully understand them and then post my findings), I don't think these actions make much sense, especially when considering the amount of time it takes to level the chassis base, and so on, and considering that the turntable itself is also not new.
For me personally, this was a one-time thing, and I won't repeat it for others.
A "smart" replacement part from a cheaper source is the better alternative.
3B5 AJM
Wer nichts weiss, muss alles glauben.
**Technische Fragen bitte ins Forum und nicht in mein Postfach**
Is the marked area a defect, or is there possibly a crack visible there?
To avoid having to constantly search for the correct position when repeatedly screwing and unscrewing the VTG, I have marked it there (see picture 6). I'm just paranoid about it and suffer from a marking obsession.
I wasn't referring to your marking in the black soot, but rather the one that's approximately 180 degrees opposite to it.
I probably still had the image of RedR32's charger in the back of my mind, as he had already shown pictures of it some time ago.
To avoid having to search for the correct position each time when repeatedly screwing and unscrewing the VTG, I have marked it there (see picture 6).
@Roger
BM probably refers to the two red dots on the exhaust housing, which are intended to help quickly and accurately position the adjustment ring.
As a reference point, drilling the pass-through sleeve would have been sufficient.
Here is the spot with the potential crack, which Roger has marked.
2010 Caddy kombi life 103 tdisg6 BMM KXW
reflexsilber met.
you made in the black soot, but the one approximately 180° opposite to that... I marked exactly there with a sharp screwdriver. Unfortunately, when cleaned, you can only see the mark on the Vtg.
In all the other photos, the adjustment ring covers this area.
However, I wouldn't completely rule out a crack, similar to the one seen in Red32s' image. In the image view of both photos, it's quite clear that the same area is affected, which suggests a crack.
Unfortunately, I didn't see him live.
That's just how it is when the eyes can't focus properly
Quote:
. Nevertheless, I'm not overly worried about it.
As a reference point, drilling the pass sleeve would have been sufficient. That's correct, if I had recognized it immediately }.
3B5 AJM
Wer nichts weiss, muss alles glauben.
**Technische Fragen bitte ins Forum und nicht in mein Postfach**
you made in the black soot, but the one approximately 180° opposite to that...
I marked exactly there with a sharp screwdriver. Unfortunately, when cleaned, you can only see the mark on the Vtg.
In all the other photos, the adjustment ring covers this spot.
The indicator light unit can only be mounted in one position because the mounting holes are arranged offset. Okay, now I'm calm. }
From a professional workshop perspective, you can't really endorse a "sterilized" loader like that. However, it's acceptable for private use, as long as you know what kind of junk you're dealing with.
2010 Caddy kombi life 103 tdisg6 BMM KXW
reflexsilber met.
What do you think of the values? I once tried to create a somewhat informative diagram, but please don't judge me too harshly.
@ Rainer: What do you think about it? In my opinion, the turbo lag seems a bit too pronounced at low RPM, although I haven't noticed any differences compared to similar engines. The system is leak-free, and the VTG (Variable Turbine Geometry) mechanism is working perfectly.
A4_Log.jpg
Description:
File size:
126.48 KB
Viewed:
2643 times
3B5 AJM
Wer nichts weiss, muss alles glauben.
**Technische Fragen bitte ins Forum und nicht in mein Postfach**
@ Rainer: What do you think about it? In my opinion, the turbo lag feels a bit too pronounced at low RPMs.
Okay. How much clearance is there, actually, with the two M6 screws used to secure the VTG adjustment box?
I would try loosening them by pulling the can towards the "up" direction (towards the top of the ZK lid) and then tightening it again.
Is the vacuum system also leak-tight, and is there sufficient vacuum pressure?
How much play is there, actually, in the two M6 screws used to secure the VTG adjustment box?
For the turbo, there are 3 screws. There might be a clearance of about 0.5 mm, if I remember correctly.
I haven't made any changes to the VTG rod. The vacuum is fully engaged, and the VTG is pulling all the way.
What do you think, does it make sense to correct this, or should we leave it as it is?
Edit: Silly question: Could it be possible that the condition returns to a largely normal state once enough soot has accumulated again, and the guide vanes effectively seal better, both upwards and downwards?
3B5 AJM
Wer nichts weiss, muss alles glauben.
**Technische Fragen bitte ins Forum und nicht in mein Postfach**
How much play is there actually in the two M6 screws used to secure the VTG adjustment box?
For the turbo, there are 3 screws. There might be a clearance of about 0.5 mm, if I remember correctly.
I have made no changes to the VTG rod. The vacuum is fully engaged, and the VTG is pulling all the way to its stop.
If the adjustment rod has an M6x1 thread, it would be half a turn, I would try it.
BM wrote:
What do you think, does it make
sense to correct it, or should we leave it as it is?
You can get very close, as long as you don't enter the Russian boundary (measurement block ). You can leave it.
If you want the engine to respond more quickly to the accelerator pedal, you should pull up on the nozzle and then tighten it.
BM wrote:
Edit: Silly question: Could it be possible that the condition normalizes again, to a large extent, once enough soot has accumulated and the guide vanes essentially seal better, both upwards and downwards?
No idea, it's possible... but does it really matter?
Best regards, Rainer.
PS: Is the exhaust temperature sensor properly screwed in? Mine had come loose and was leaking.
No idea, it's conceivable...but does it really matter?
Before I take any further action, I'm going to let the man drive like that for two weeks first, so that the situation can settle down a bit.
Let's see what the man has to say. After that, I might look into it again.
Quote:
PS: Is the exhaust temperature sensor properly screwed in again? Mine had already come loose and started leaking...
Oh, why. Do you have to take them out ? I haven't touched them.
3B5 AJM
Wer nichts weiss, muss alles glauben.
**Technische Fragen bitte ins Forum und nicht in mein Postfach**
Um, why? Do you have to take them out? I haven't touched them.
The sensor is located in the charger housing. I can see that the charger has a different part number. Where is the exhaust gas temperature measured on this engine?


 Bookmarks
 Links
Links Garage
 FAQ, Legal Notice & Privacy
 RSS Feed
 Register
 Login
Login






 I'm just a bit paranoid about it and suffer from a marking obsession.


 I marked exactly there with a sharp screwdriver. Unfortunately, when cleaned, you can only see the mark on the Vtg.
 That's correct, if I had recognized it immediately }.