
| Diesel, Engine Technology and Vehicle Technology. Repair, Maintenance and Diagnostics (OBD). |
Installation instructions for a Calix immersion heater (Articles) |
|
|
| 🔗 ⭐ 🖨 |
| Installation instructions for a Calix immersion heater | |
|---|---|
| dieselschrauber |
|
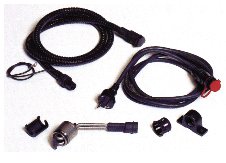 This post is by Rudi and Bertil, and I would like to thank them both very much! The installation was performed on a VW vehicle with a 1Z engine, and installation kits are also available for newer models (see below). A Calix engine pre-heater is an electric device that warms up the engine, providing more comfort during the colder seasons. By pre-heating the engine via a power outlet, the wear and tear associated with cold engine starts is eliminated, and warm air is immediately available from the vehicle's heating system. Useful special tool:
Make sure the engine is warm (both radiator hoses should be warm) so that the thermostat valve is open. Otherwise, you may need to drain the coolant. the power steering pump needs to be removed). Execution: Jack up the vehicle using a jack stand or lift. Remove engine noise insulation. verschandeln the lower coolant hose and its surrounding area with a damp cloth. Crimp the clamp on the lower radiator hose using pliers and. Push it away from the strut towards the radiator. Achtung, ab jetzt kann heißes Wasser kommen! Place the collection container underneath. Detach the hose from the fitting and drain the coolant (approximately 6.5 liters). Falls weniger (2-3 l)kommt -> leise fluchen! (siehe unten: Ausbau der Servopumpe) Close and set aside the collection container. Kühlwasserschlauch wieder auf Stutzen schieben. Froststopfen beleuchten (damit man sieht, was man tut). Using the metal rod "A", make a small hole in the center of the frost plug. schlagen (so groß, das die Schraube greifen kann aber noch genug Halt hat) Schraube in Loch eindrehen. Since it's located somewhere between the exhaust and... Antriebswellen rumfummelt ist es mit Torxschrauben aufgrund des guten The easiest way to achieve a perfect finish. Schnur an der Schraube befestigen (damit der Stopfen nicht auf "Never again" disappears into the engine block; the other end remains at the car. (to secure). Using a metal rod "B" (position it between the screw and the edge of the stopper), then... "Stopfen kippen" (I have completely lost this ability, but I was able to use the...) (The cord can be retracted). Roll the blunt so that you can grip the edge with pliers. Pull out the stopper (it surprisingly comes out easily, even with the stopper lying horizontally). Dry the Stopfenloch. Apply silicone to the rear edge of the diving bell. Carefully insert the immersion heater, align it, and tighten the nut evenly. Tighten until the collar rests against the engine block. Reattach the clamp to the correct position. Slowly refill the cooling water (otherwise, the expansion tank will overflow). Connect the cable (don't forget the plastic clip) and, if desired. (feeling awkward, I think the space in the water tank is the best - thanks to Bertil for the tip) Expansion of the power steering pump: If, unexpectedly, only a portion of the cooling water were to leave the cooling circuit, Does that mean the thermostat valve didn't open (or has closed again)? (is full) and the block is still full ;o(. To replace the valve, you must first remove the power steering pump. Here's the translation: "For that, please add the following." three tensioning or Loosen the mounting bolts of the pump (do not remove them completely) and then... Remove the V-belt. Then, unscrew the pump bracket. Two of the... The mounting screws are easily visible from below (they are located on the edge of the oil pan). The third one is located to the left of the upper pump screw. Before removing the carrier, make sure to detach the small clamp from the servo cable. Don't forget to unscrew it (it's easy to forget, I know from experience). Otherwise, you might have to remove the entire disguise again. Okay, now remove the pump along with its bracket and secure it with some tape towards the bumper. hang. Place a bucket underneath and loosen the two screws on the thermostat housing cover. Remove the lid and be prepared for a splash of water. If no... Water leakage comes from a rubber seal (it's just loosely positioned behind the valve). Carefully unwind the hose (water is coming now!) and catch the valve. Since the casting usually doesn't fit together tightly enough on its own, so that... To prevent the valve from falling out again, the following can be done:
The assembly is essentially done in the reverse order. Images for installation:   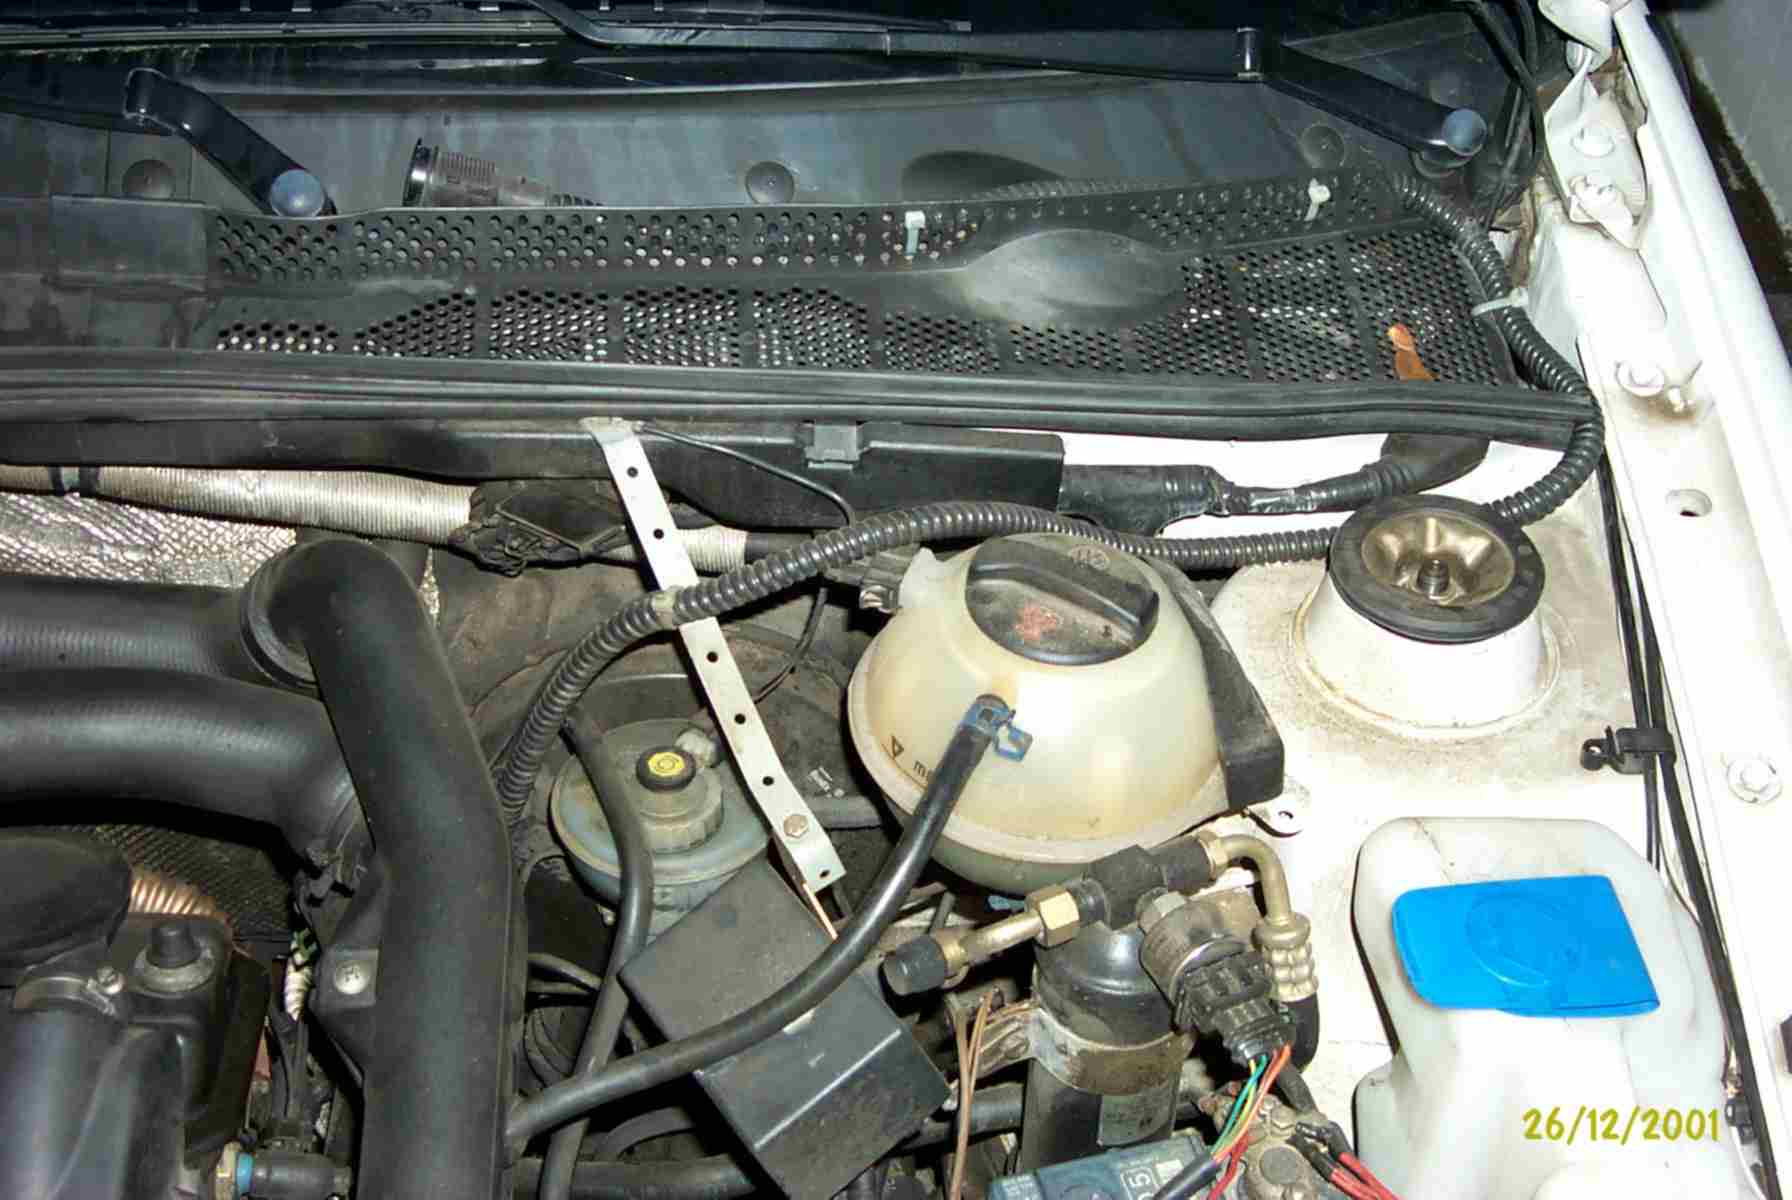 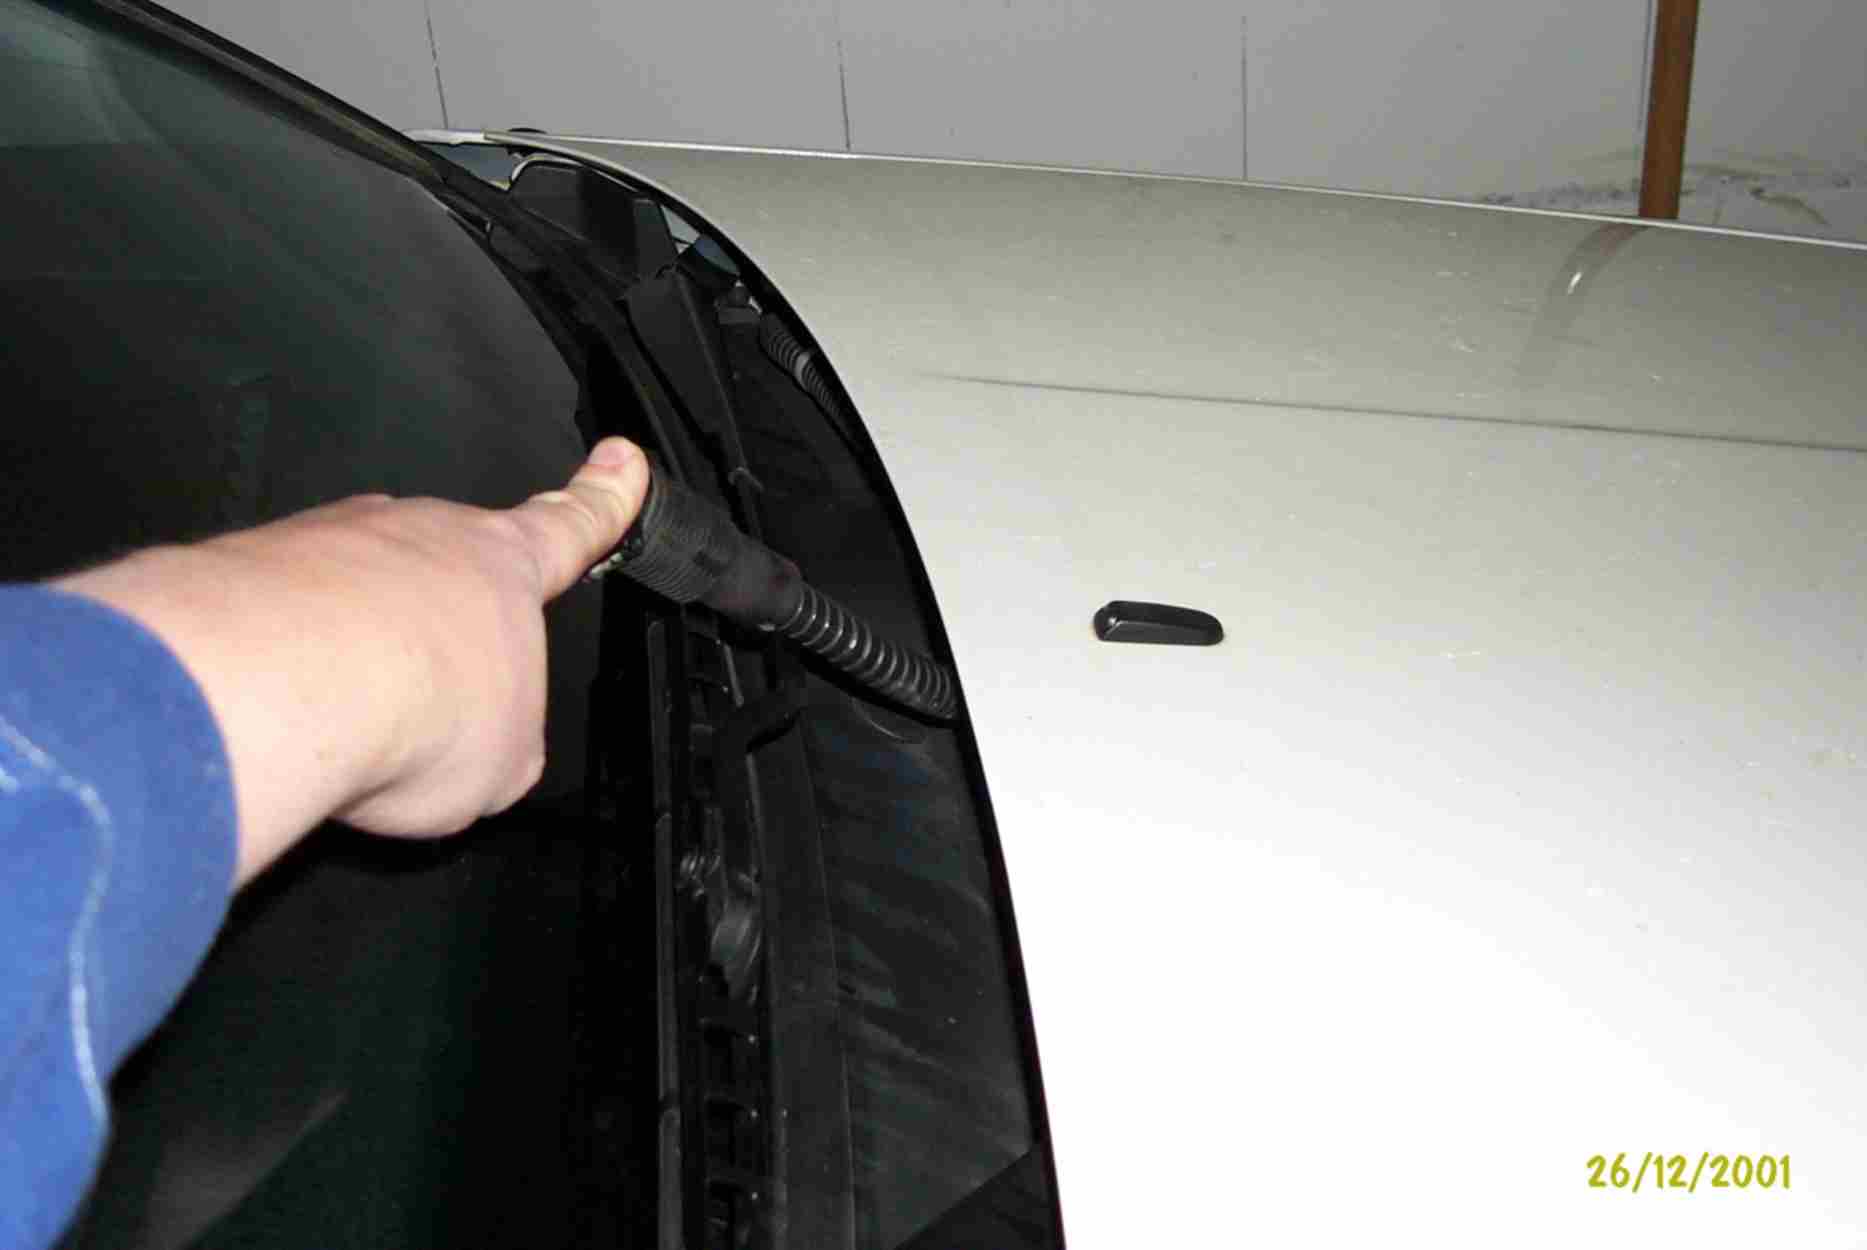
Unfortunately, the "old" immersion heater is not compatible with the AXR or ATD engine. Even with various... The immersion heater, which is located on the back of the engine block, does not fit with other turbochargers that use a variable geometry turbine (VTG). Companies CALIX or also DEFA (which is distributed in Germany by WAECO) offer solutions for this. The pictures clearly show the heater, which is inserted into the water hose connected to the oil filter flange. Here is a Calix heater for newer models: 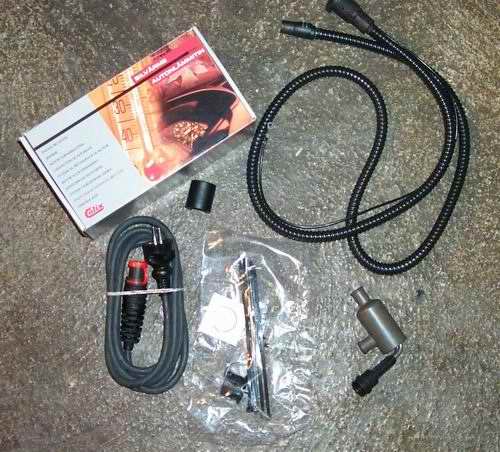 -Installation location-  -Installed- 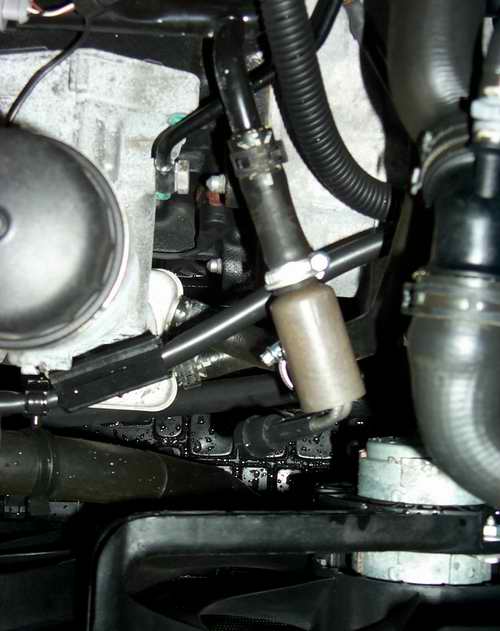 Translated on 03-07-2026, 15:19. |
|
| Ratings - Installation instructions for a Calix immersion heater | |
Average rating: 5.00 - worst rating: 5 - best rating: 5 - number of ratings: 2 - View ratings |
|
|
| 🔗 ⭐ 🖨 |
|
You cannot post new topics in this forum. |
|
|
Foren- und Portal-Software: V7.6 © 2003 - 2026 Kaufmann Automotive GmbH, Embedded Softwareentwicklung & Shop für VCDS und OBD-Diagnosegeräte. Parse time: 0.067s
|
