| Author |
Message |
Autoservice
Profi-Schrauber

Joined: 04/14/2012
Posts: 2130
Karma: +99 / -0 
Location: Nähe Düsseldorf
Support
|
 22-04-2014, 22:01 Subject: 22-04-2014, 22:01 Subject: |
Quote |
|
Quote: | | To be honest, I believe that WD40 works on rusted screws about as well as homeopathy does for a cold. There's no doubt that it significantly reduces friction on threads, etc., but not a single drop gets into the rust layer between the offending screw and the wheel bearing housing. I've been spraying the bolt every week for weeks. If that were enough, the screw should have come out easily. |
Now you are writing nonsense  .
WD-40 gets into every nook and cranny where something might be stuck (I've been using this stuff for ages).
Have you ever thought about the fact that rusted steel increases in volume  ?
If you spray and simultaneously "massage" the area with a cloth or tool, it will eventually work with WD-40. You just need the necessary patience for this type of task.
If you think you can keep turning the screw head even though the screw is just twisting and not tightening, then you're simply out of luck – it's a sign of inexperience. LG, Onkel BM
*Nichts ist einfacher, als sich schwierig auszudrücken......*
**Technische Fragen bitte ins Forum und nicht in mein Postfach**
Translated on 07-08-2026, 11:10.
|
|
| Back to top |
Profile PM |
 |
Steffen G
Profi-Schrauber
Joined: 10/26/2006
Posts: 2554
Karma: +590 / -0
Location: bei Zwickau
Premium Support
|
| 22-04-2014, 22:19 Subject: |
Quote |
|
Hello!
I deal with WD-40 at work because it's a huge hassle to order anything else due to safety data sheet requirements; we can only purchase items that are listed in an internal catalog. So, I can't get anything other than that.
In my personal life, I can buy whatever I want.
I don't have WD-40 available here.
For normal applications, just use a standard, inexpensive rust remover.
In difficult situations, this has often helped me a lot:
http://www.engelbert-strauss.de/Betriebsbedarf/Bauzubehoer/Mehrzwecksprays/Rost-Schock-7130190-5097026-0-0.html
I highly recommend it.
It's very effective; it has helped me many times when I was stuck and couldn't move forward. Grüße, Steffen!
Golf 4 TDI,
T4 Doka-Pritsche, paar Oldtimer
Translated on 07-08-2026, 11:12.
|
|
| Back to top |
Profile PM |
|
haehnlein
Schrauber

Joined: 08/22/2002
Posts: 877
Karma: +6 / -0
Location: Griesheim
Support
|
| 22-04-2014, 23:11 Subject: |
Quote |
|
Autoservice wrote: | WD40 gets into every nook and cranny where something might be stuck (I've been using this stuff for ages).
Have you ever thought about the fact that rusted steel increases in volume ?
|
In my opinion, this is a contradiction. The space between the screw and the casing is sealed by rust. How can WD40 possibly get in there? Chemically, WD40 mainly consists of mineral oil and naphtha. How could it use these components to convert the iron oxide in that space back into pure iron or other (smaller volume) compounds, thereby opening up the sealed cavity again? Of course, WD40 works wonders on accessible rusty threads. However, I don't believe it can penetrate a space sealed by iron oxide because it doesn't trigger any significant chemical reactions with rust. ____________
Für Antworten danke ich Euch im Voraus. Gruß Christian
Kein Auto mehr!
Translated on 07-08-2026, 11:14.
|
|
| Back to top |
Profile PM |
|
Herbert
Profi-Schrauber
Joined: 06/22/2005
Posts: 4629
Karma: +1344 / -0
Premium Support
|
| 23-04-2014, 8:24 Subject: |
Quote |
|
Rust is porous and has a relatively loose structure rather than being compact. Rust blocks movement due to friction.
"Rust converters" are penetrating oils that, due to their properties, are capable of penetrating even into the smallest crevices within the rust structure. This significantly reduces friction, displaces water from the structure, and effectively loosens the rust bonds.
Therefore, when dealing with screws, bolts, or other fasteners that are stuck due to rust, use a rust remover and allow sufficient time for it to work.
Herbert. Horch A4 8K CJCD
Golf 7 DDYA
(+ Audi 80 Avant B4 1Z 475Tkm - habe ich vom ersten bis zum letzten Tag gerne gefahren)
(+ Passat Variant 32B CY 400Tkm)
Translated on 07-08-2026, 11:16.
|
|
| Back to top |
Profile PM |
|
matthiasTDI96
Profi-Schrauber
Joined: 02/27/2003
Posts: 5886
Karma: +252 / -0
Premium Support
|
| 23-04-2014, 9:27 Subject: |
Quote |
|
"...and a little 'mechanical' assistance can also be helpful, as in some cases these porous structures may need to be loosened or broken apart, as mentioned by the previous speaker (e.g., through massaging or chiseling)."
Translated on 07-08-2026, 11:17.
|
|
| Back to top |
Profile PM |
|
Roger
Profi-Schrauber

Joined: 10/11/2002
Posts: 3035
Karma: +88 / -0
Location: Rodgau
2017 Volkswagen Golf
Premium Support
|
|
| Back to top |
Profile PM Garage |
|
pax
Profi-Schrauber

Joined: 12/10/2003
Posts: 426
Karma: +10 / -0
2000 Volkswagen Passat
Support
|
| 24-04-2014, 21:08 Subject: |
Quote |
|
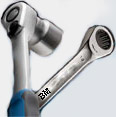
However, there are also options available in the "affordable" category, such as the Proxxon Microclick multi for approximately 140 euros.
By the way, my practical experience as a hobbyist tinkerer with that troublesome screw is roughly like this:
"The first time, I completely messed it up without a plan, destroying the threads on the screw. The rest was eventually removed by a mechanic who, after loosening the tie rod end and manipulating the wheel bearing housing, managed to extract it from the top with a powerful impact wrench after quite some effort."
2) The second time, I accidentally ripped the head off, and I successfully completed the self-assembly version, even using my own creativity and without looking online .
"On the third attempt, the car owner had obtained a puller, but not the Klann brand. At that time, there was also a two-piece set from Nordec – a large puller for breaking free and a smaller one for pushing out. Unfortunately, the colleague had only ordered the small part. We destroyed it after 5 minutes. After that, we continued with drilling, but since that wasn't working well, we removed the wheel bearing housing along with the upper control arms and used the workshop press to push out the remaining screw fragments."
"On the fourth attempt, the screw was sprayed with rust remover for a period of time, and then its head was intentionally broken off, after which it could be easily removed using an extractor tool."
For me, the realization that the self-extraction method worked quite well (at least back then when the vehicles were only a few years on the market) has stuck with me. Also, I was already familiar with the cinema design with the lower control arm, as described here, and wouldn't have thought of removing it unnecessarily. You end up sweating just as much trying to loosen that stubborn screw. Furthermore, I've replaced the upper control arms twice, where that troublesome screw definitely needs to be removed, while the two lower ones are still the original factory parts (345,000 km). Therefore, it's simply smart to remove the screw and re-grease it each time you replace the ball joints, especially when working on your own car with limited tools – that way, it always comes out easily, and you can focus on the actual work.
These constant velocity joint boots on my 3B need to be replaced every 3-4 years (original parts). Do the aftermarket boots actually last longer?
Bye.
peace
Translated on 07-08-2026, 11:20.
|
|
| Back to top |
Profile PM Garage |
|
haehnlein
Schrauber
Joined: 08/22/2002
Posts: 877
Karma: +6 / -0
Location: Griesheim
Support
|
| 24-04-2014, 22:07 Subject: |
Quote |
|
Autoservice wrote: | | This should also work without lowering it. Once the screw is out of the first hole, it can be removed at an angle. |
Hello,
"I received the new control arm today. However, I gave up again. No matter how hard I try, I can't imagine that the bolt on the engine mount will come out without some extra work. There are already diesel lines running just 2 cm away from the axis of the bolt. So, you would have to tilt the bolt at least 20 degrees to get around them somehow. This means that the control arm bushing would have to be rotated by the same angle, assuming the bolt even comes out far enough. I couldn't see how it could work..."
Out of frustration, I ended up replacing the rear shock absorbers as an alternative, which was very simple (no need to remove any interior panels like before, just loosen three screws without removing the wheels). After that small success, I drove to the workshop with a clattering front axle. Let's see how this all ends up... ____________
Für Antworten danke ich Euch im Voraus. Gruß Christian
Kein Auto mehr!
Translated on 07-08-2026, 11:25.
|
|
| Back to top |
Profile PM |
|
haehnlein
Schrauber
Joined: 08/22/2002
Posts: 877
Karma: +6 / -0
Location: Griesheim
Support
|
| 29-04-2014, 20:12 Subject: |
Quote |
|
Hello,
All's well that ends well. The evil screws are dead and buried forever  . However, the workshop had massive problems. On both sides (I also had the other side done at the same time), even with Klann's special tool, nothing could be done. With approximately 6 tons of pressing pressure, the bolt simply bent in the free area of the wheel bearing housing. Consequently, the evil bolt was cut into three pieces on each side using a saw through the slots in the axle knuckle. Only then could the individual parts be removed with brute force and by heating the housing. The problem, as I suspected earlier, was that the stability of the screw had been significantly reduced due to its age.
The workshop was generally only willing to replace the lower control arm on both sides. I had already purchased the right one online for €75 (Lemförder). The workshop couldn't find the same part for the left side for less than €125 (with a 5% profit margin). The installation cost was €240. It was definitely necessary to lower the engine mount in order to remove the screws of the lower rear control arms. It would not have been possible without twisting or otherwise manipulating the screws. They then carefully installed the new screws with anti-seize paste. I had even considered treating the new screw and the guide in the wheel hub with zinc spray. Next time, I will probably do that myself.
Conclusion: People, only remove the drive shafts if a workshop has already replaced those troublesome screws beforehand. With high mileage and age, it's practically impossible to remove this screw using DIY methods  . The only option would be to grind off the screw on both sides, then remove the axle knuckle, and precisely drill it out with a cobalt drill bit and a standing drill press. While doing that, you can definitely replace the lower rear control arms as well, because the Allen key used to hold the pin in place is likely stripped after so much time. ____________
Für Antworten danke ich Euch im Voraus. Gruß Christian
Kein Auto mehr!
Translated on 07-08-2026, 11:28.
|
|
| Back to top |
Profile PM |
|
haehnlein
Schrauber
Joined: 08/22/2002
Posts: 877
Karma: +6 / -0
Location: Griesheim
Support
|
| 29-04-2014, 20:25 Subject: |
Quote |
|
By the way, I now know why this product from KS Tool is no longer available on the market (due to poor reviews). It would have definitely failed.
By the way, I found a rental workshop near my place. They immediately told me that it's best to go to whoever designed this design flaw (VW/Audi). They've had several cases where this particular screw simply wouldn't come out, even with an air hammer, press, etc. ____________
Für Antworten danke ich Euch im Voraus. Gruß Christian
Kein Auto mehr!
Translated on 07-08-2026, 11:31.
|
|
| Back to top |
Profile PM |
|
Herbert
Profi-Schrauber
Joined: 06/22/2005
Posts: 4629
Karma: +1344 / -0
Premium Support
|
| 29-04-2014, 22:02 Subject: |
Quote |
|
Quote: | | The only possible way would be to remove the screw from both sides, then disassemble the axle housing and precisely drill it out using a cobalt drill bit and a bench drill. |
Why should anyone copy your failed "tear-off" method?
Herbert. Horch A4 8K CJCD
Golf 7 DDYA
(+ Audi 80 Avant B4 1Z 475Tkm - habe ich vom ersten bis zum letzten Tag gerne gefahren)
(+ Passat Variant 32B CY 400Tkm)
Translated on 07-08-2026, 11:32.
|
|
| Back to top |
Profile PM |
|
haehnlein
Schrauber
Joined: 08/22/2002
Posts: 877
Karma: +6 / -0
Location: Griesheim
Support
|
| 29-04-2014, 22:23 Subject: |
Quote |
|
Herbert wrote: | | Why should anyone copy your failed tearing method when it's already unsuccessful? |
If you need to drill out a screw, you first have to loosen it significantly to allow the drill bit to properly engage. However, this requires removing the entire shock absorber assembly, including the upper control arms and the axle shaft. The lower components also need to be detached, which is definitely not an easy task.
Of course, that was not a recommendation. In my opinion, there is only one sensible option: Have the faulty screw replaced beforehand by a workshop that has the necessary experience . Anything else will inevitably lead to high (cost) expenditure. ____________
Für Antworten danke ich Euch im Voraus. Gruß Christian
Kein Auto mehr!
Translated on 07-08-2026, 11:33.
|
|
| Back to top |
Profile PM |
|
Autoservice
Profi-Schrauber
Joined: 04/14/2012
Posts: 2130
Karma: +99 / -0
Location: Nähe Düsseldorf
Support
|
| 29-04-2014, 22:27 Subject: |
Quote |
|
Quote: | | Conclusion: People, only remove the drive shafts if a workshop has already replaced those troublesome screws beforehand. With high mileage and age, it's practically impossible to remove this screw with DIY tools icon_exclaim.gif. The only option would be to grind off the screw on both sides, then remove the axle knuckle, and precisely drill it out using a cobalt drill bit and a bench drill press. While doing that, you can definitely replace the lower rear control arms as well, because the Allen key used to hold the pin in place is likely stripped after so much time. |
Sorry -- please don't spread any nonsense here .
The upper control arms absolutely do not need to be disconnected for removing the drive shafts.
It is sufficient to loosen the lower rear control arm and steer/pivot the corresponding side forward and inward in order to remove the drive shaft ends from the wheel bearing housing.
"If you're afraid of damaging the lower control arm when working on the vehicle, you can solve the problem from the vehicle side. If you think it's not possible without loosening the engine mount, then just lower it." LG, Onkel BM
*Nichts ist einfacher, als sich schwierig auszudrücken......*
**Technische Fragen bitte ins Forum und nicht in mein Postfach**
Translated on 07-08-2026, 11:35.
|
|
| Back to top |
Profile PM |
|
haehnlein
Schrauber
Joined: 08/22/2002
Posts: 877
Karma: +6 / -0
Location: Griesheim
Support
|
| 29-04-2014, 22:37 Subject: |
Quote |
|
Autoservice wrote: | | Sorry -- please don't spread any nonsense here | .
What is nonsensical about this  : I'm talking to people like me, who want to do this in the garage without a pit or lift. Of course, you can only remove the lower rear control arm in a workshop with a lift and other equipment. Using a jack to support the engine mount on the street is probably more than dangerous . So, there's really only the choice between two bad options: either lowering the engine mount (which is difficult) or dealing with a seized bolt because the Allen key has rusted (which is also problematic). ____________
Für Antworten danke ich Euch im Voraus. Gruß Christian
Kein Auto mehr!
Translated on 07-08-2026, 11:37.
|
|
| Back to top |
Profile PM |
|
T3Surfer
Profi-Schrauber
Joined: 09/17/2004
Posts: 1833
Karma: +34 / -0
Location: Frankurt
2001 Seat Toledo
Premium Support
|
| 29-04-2014, 22:38 Subject: |
Quote |
|
Car service: 1+ NA,Gehörlose wie ich können auch Schrauben! Ihr HÖRT ich FÜHLE! T3 TD EX-JX Jetzt 1Z mit 122PS und Renaultgetriebe Golf II TD Bj 84 512Tkm Passi 35I 1Z 468Tkm--> Seat Toledo AHF-- Toledo ARL 477Tkm mit Spritspartuning 99er T4 Syncro-Cross 100800km grad eingefahren
Translated on 07-08-2026, 11:38.
|
|
| Back to top |
Profile PM Email Garage |
|
|


 Bookmarks
 Links
Links Garage
 FAQ, Legal Notice & Privacy
 RSS Feed
 Register
 Login
Login


